
Insert the Current Date with a Keyboard Shortcut
Here’s a useful Mac tip to insert the current date in your preferred format nearly anywhere. It does not require any third-party software that can potentially slow down your computer and cost money.
I’ll show you how to add two specific date formats, as well as one for the current time, with this technique. You can use any, all, or a customization that suits your purposes.
You can either download my zip file (recommended) or paste the code into Automator yourself.
With My Downloadable “Quick Actions”
Date and Time Quick Actions.zip
Download this zip file. Unzip it. Place the contents in the correct location.
From a Finder window, just use the menu item Go > Go to folder…, enter “~/Library/Services” (no quotes), and hit Return.
Then drag the Workflow files you unzipped into the folder.
You will probably need to do something to get macOS to recognize these scripts. I recommend simply opening these scripts in Automator (by double-clicking each of them), then closing them. Or just log out of, and then back into, your Mac!
If this is successful, then in most applications, you should be able to view your new Quick Actions by clicking the current application name in the menu bar (top left of the screen) and then hovering over Services.
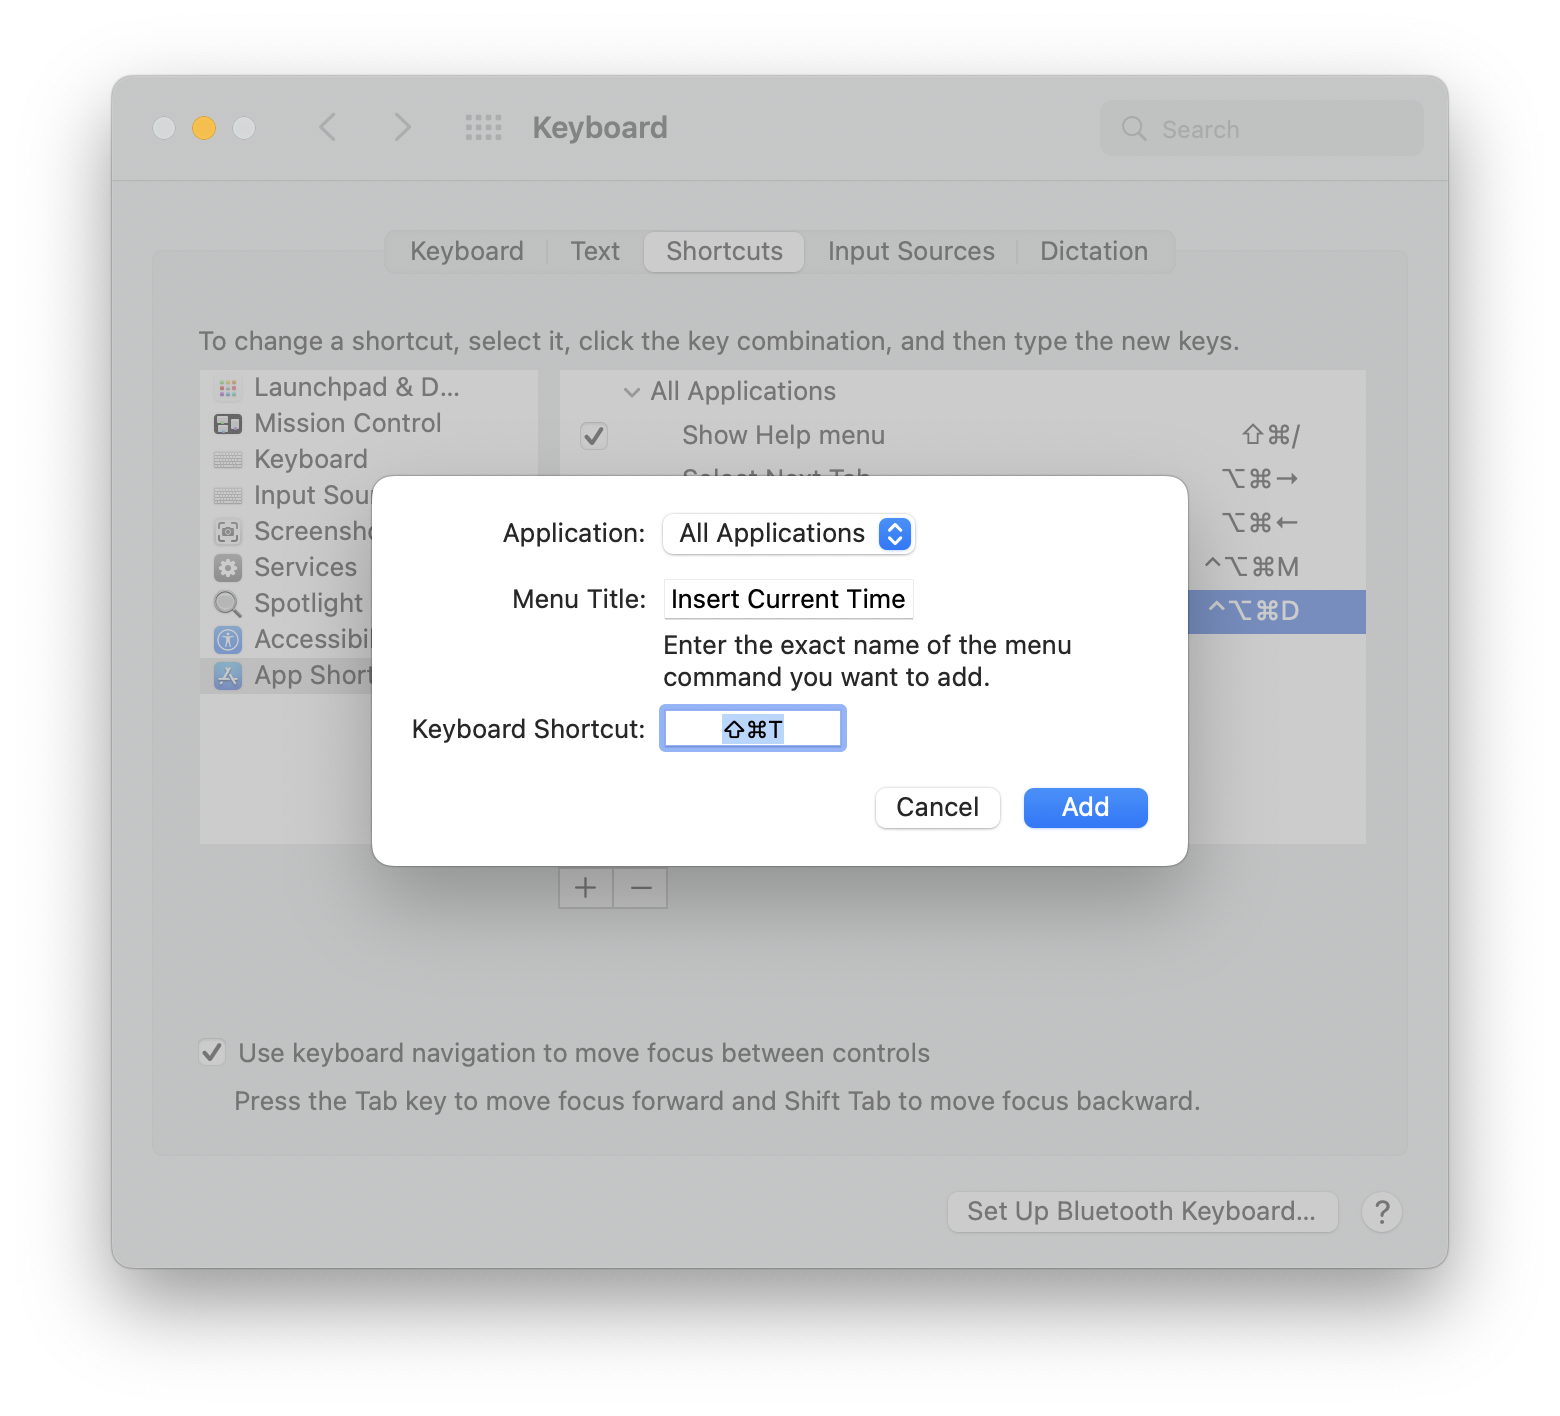
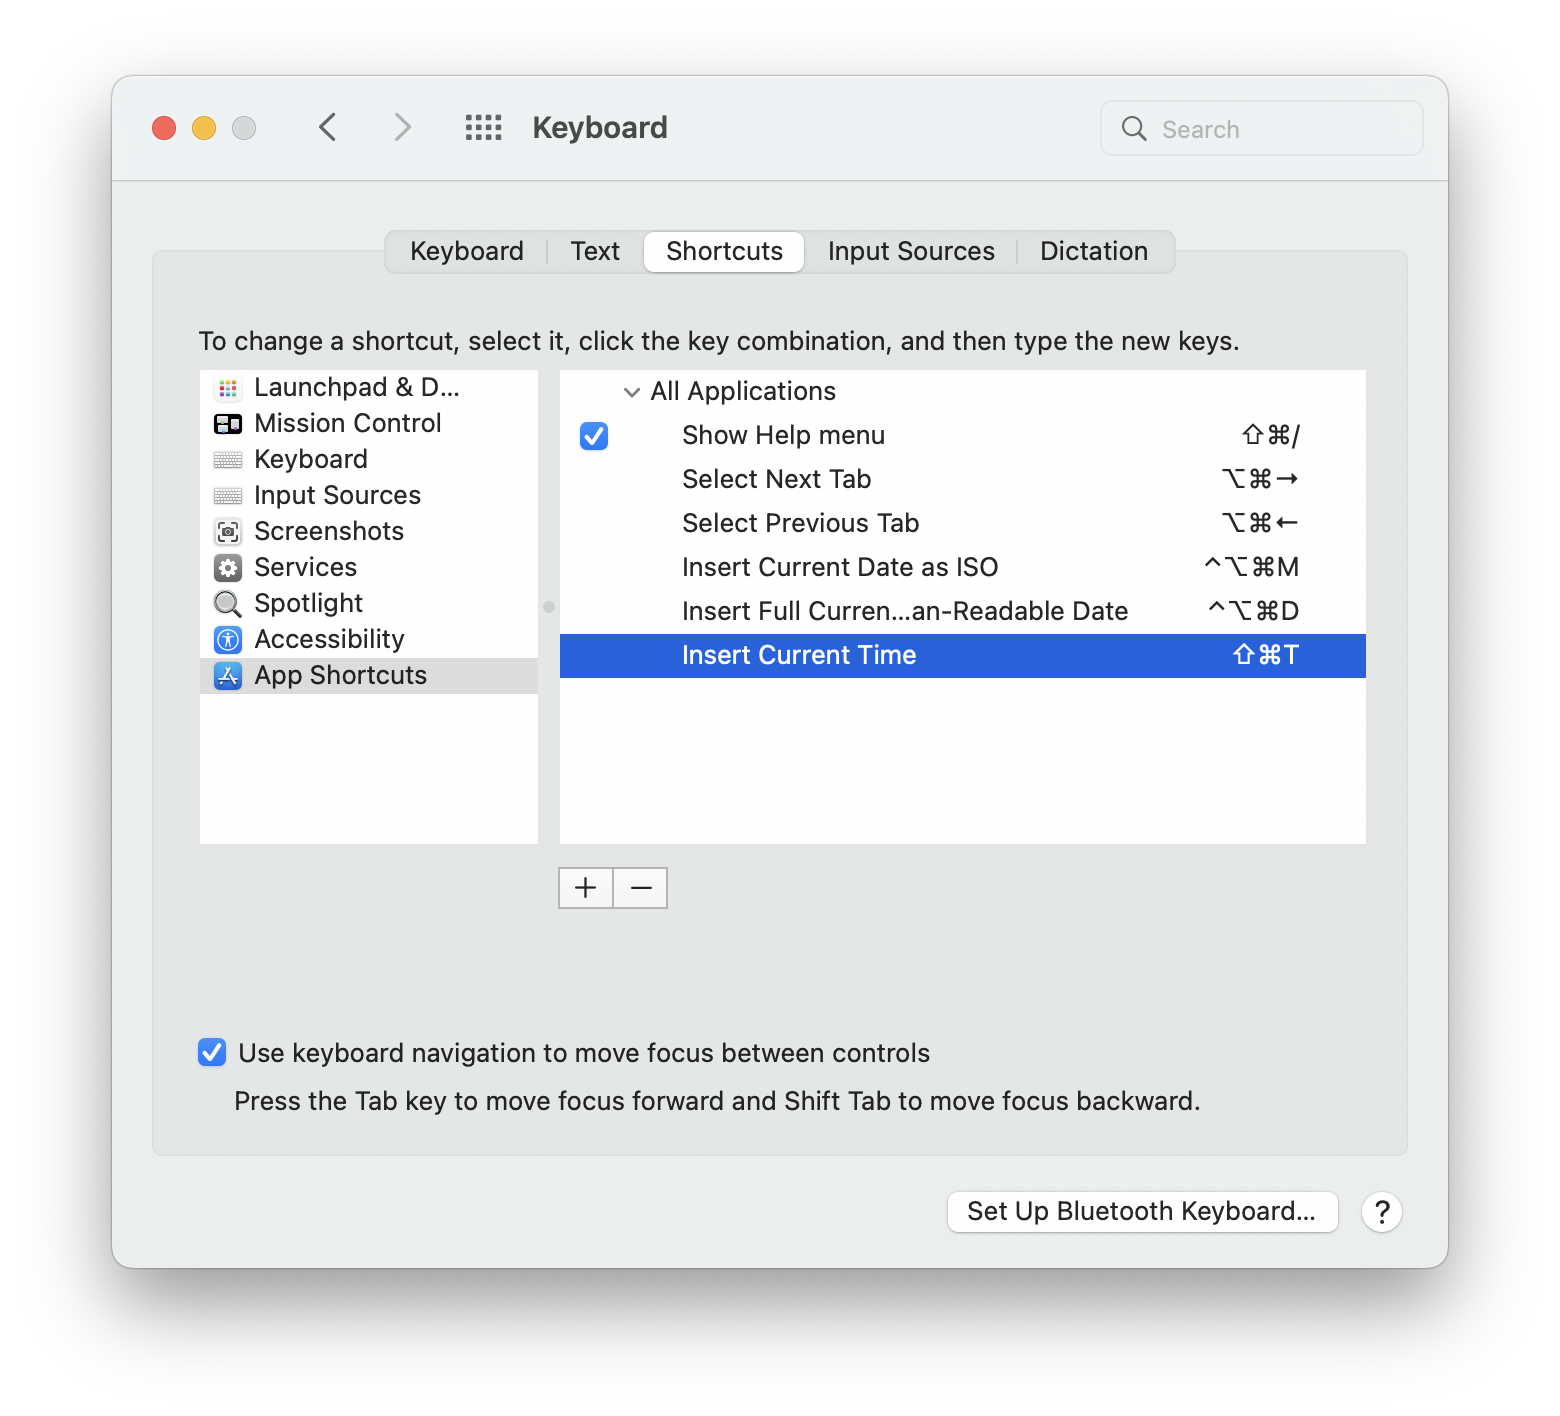
Now let's make these actions available by keyboard shortcuts! Open System Settings > Keyboard > Shortcuts. Select “App Shortcuts” on the left. Select “All Applications” on the right. Click the Add button (which looks like a plus sign). For “Menu Title,” the exact name of the first Workflow you created; in my case it is “Insert Current Date as ISO”. Then set any shortcut you’d like; I’m rolling with “^⌥⌘M”. (This step works because your Quick Action workflow appears in the menu bar under [App Name] > Services all the time.) I recommend the shortcuts and names in the table below.
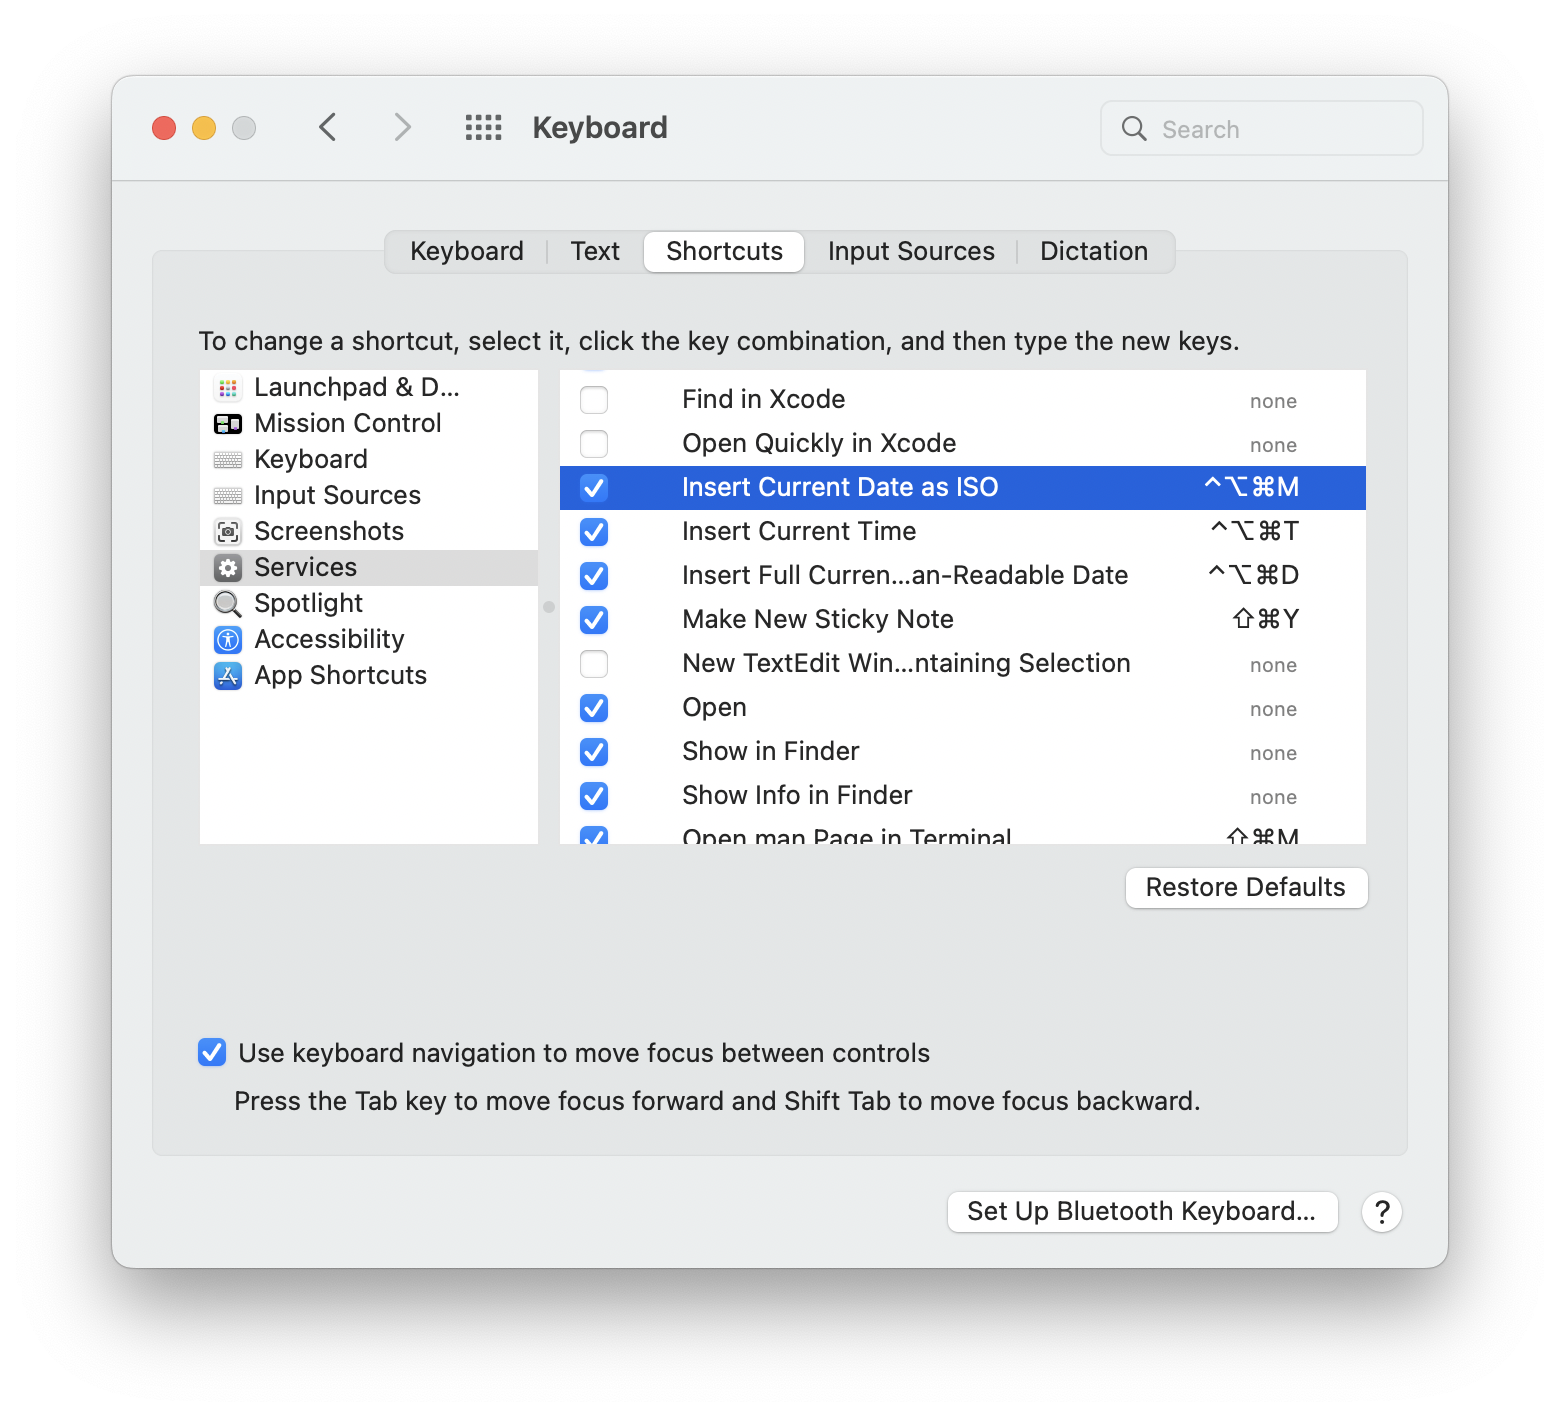
Because sometimes the above shortcuts don’t take, for some odd reason, there is one more step for each shortcut. While we are in System Settings > Keyboard > Shortcuts, Click “Services” on the left, expand the ”Text” section if applicable, find your new date/time actions, and add a keyboard shortcut to each. (Don’t see your actions? Take a look at the notes under step 1.) Use the same keyboard shortcut for each action as you did in the previous step! One or the other of these mechanisms should work — at least most of the time.
That’s it. Now in almost any context, you can invoke your keyboard shortcut to insert the current date in ISO format at your insertion point (where the blinking cursor is, or replacing any currently selected text).
My Date & Time Shortcuts
| Name | Suggested Shortcut | AppleScript |
|---|---|---|
| Insert Full Current Human-Readable Date |
^⌥⌘D | |
| Insert Current Date as ISO |
^⌥⌘M | |
| Insert Current Time | ^⌥⌘T | |
Alternatively, Use Automator Yourself
Here is the manual method in case you don’t trust my downloadable zip.
- Open Automator.
- Create a new document of type “Quick Action”.
- Insert “Run AppleScript” item.
- Replace the text with one of the short scripts from the table above. (Safety tip: Ask a trusted programmer friend if the code looks safe.)
- Choose “Workflow receives no input in any application,” and check “Output replaces selected text.”
- Save it with an appropriate name (my suggestion is to use the corresponding value in the first column of the table above). It should default to the correct location, which is your user directory’s Library/Services file.
- Now follow the remaining steps from the downloadable method, starting with step 2.
What About iPhones?
Bonus tip: Do you miss this shortcut on your iPhone or other iOS device? There is an affordable app that provides similar functionality via a software keyboard: TimeStamp Keyboard.
Updated April 2024 with newer System Settings screen shots, no longer showing a mismatched keyboard shortcut. Thanks to reader Lynn for reporting the error. I also changed references from System Preferences to System Settings, reflecting changes in macOS since this article was originally published.
Thanks to CJK for a helpful answer on Stack Overflow that gave me most of what I needed here. Let me know if you liked this tip or have feedback on it.